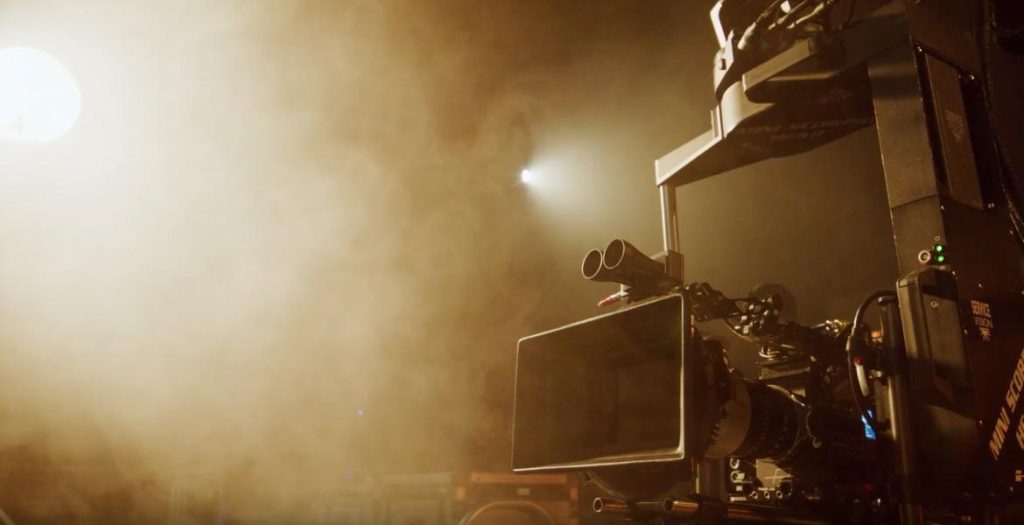
Film shooting is an exciting, creative process. It brings stories to life on screen.
From planning scenes to directing actors, film shooting is a journey. It involves many steps and hard work. Filmmakers often face challenges, but the results are rewarding. This blog will dive into the world of film shooting. You’ll learn about the key stages and techniques.
Whether you’re a budding filmmaker or curious about the process, there’s something here for you. Discover what it takes to make a film. Understand the magic behind the camera. Get ready to explore the art of film shooting.

Credit: www.premiumbeat.com
Pre-production Planning
Pre-production planning is the foundation of any successful film shoot. It’s the stage where ideas turn into actionable plans, and every detail is meticulously organized to ensure smooth execution. This phase involves breaking down the script, scouting locations, and preparing all the logistics needed to bring your vision to life.
Script Breakdown
Breaking down the script is one of the most critical steps in pre-production. It involves analyzing the screenplay to determine all the elements required for each scene. This includes:
- Identifying characters
- Noting props and costumes
- Listing special effects
- Understanding the timeline
When I worked on my first short film, I underestimated the importance of script breakdown. We ended up scrambling for props last minute. Lesson learned—don’t skip this step. It saves time and prevents chaos on set.
Location Scouting
Location scouting is about finding the perfect places to shoot your scenes. It’s not just about visual appeal; it’s also about logistics. You need to consider:
- Accessibility
- Permits and permissions
- Weather conditions
- Proximity to amenities
Imagine setting up a shoot in a picturesque but remote location, only to realize there’s no power source nearby. During one of my projects, we faced this exact issue. It taught me the importance of thorough scouting.
Pre-production planning might seem tedious, but it’s where your film begins to take shape. Have you ever faced unexpected challenges because of poor planning? Share your stories and insights below!
Essential Equipment
Cameras, lights, and microphones are essential for film shooting. Tripods and stabilizers ensure steady shots. Editing software brings the final touch.
When it comes to film shooting, having the right equipment is crucial. The right gear can make the difference between a good film and a great one. Whether you’re a beginner or an experienced filmmaker, understanding the essential equipment is key to producing high-quality content. Below, we’ll delve into two critical categories: Cameras and Lenses, and Lighting Gear.Cameras And Lenses
Choosing the right camera and lens can significantly impact the look and feel of your film. High-definition cameras are a staple in modern filmmaking. They capture intricate details and provide clarity. A popular choice among filmmakers is the Canon EOS C300 Mark III. Its super 35mm Dual Gain Output sensor offers excellent dynamic range, making it suitable for various lighting conditions. Lenses are just as important as the camera itself. The lens you choose can affect your film’s depth of field, focus, and overall aesthetic. Prime lenses, like the Sigma 50mm f/1.4, are known for their sharpness and low-light capabilities. Zoom lenses, on the other hand, offer flexibility in framing shots without changing your position. You might be wondering, “Do I need multiple lenses?” The answer largely depends on your project. For instance, a documentary might require a versatile zoom lens, while a narrative film could benefit from a set of prime lenses to capture different scenes with varying depths and clarity.Lighting Gear
Lighting can transform a mundane scene into something magical. Proper lighting sets the mood, highlights important details, and ensures that your shots are visually appealing. One essential piece of lighting gear is the Aputure 120d Mark II. This LED light is known for its brightness, portability, and ability to mimic natural light. In addition to LED lights, consider using softboxes and diffusers to soften harsh light and reduce shadows. Soft, diffused light can create a more natural and flattering appearance. Reflectors are also handy for bouncing light into darker areas, balancing the overall exposure of your scene. While it may seem like a lot of equipment to manage, each piece serves a specific purpose. If you’re shooting a night scene, for example, having a combination of LED lights and reflectors can help you maintain visibility without overexposing your subjects. Have you ever tried shooting a scene and felt something was off? Often, it’s the lighting that needs adjustment. By experimenting with different setups and paying attention to how light interacts with your subjects, you’ll develop a keen eye for creating visually compelling scenes. — Equipping yourself with the right cameras, lenses, and lighting gear is fundamental in the filmmaking process. Each piece of equipment plays a vital role in bringing your vision to life. Remember to consider your project’s specific needs and experiment with your gear to achieve the best results. What equipment do you find essential for your projects? Your feedback could help others make informed decisions.Camera Techniques
When it comes to film shooting, mastering camera techniques can make a significant difference in your storytelling. The way you frame a shot or move your camera can evoke different emotions and draw your audience deeper into the narrative. Let’s dive into some key camera techniques that can elevate your filmmaking.
Framing And Composition
Framing and composition are the building blocks of every great shot. How you position your subjects, objects, and scenery within the frame can tell a story all on its own. Ever notice how a character standing alone in the center of the frame can feel isolated, while the same character framed with others can seem connected and supported? That’s the power of composition.
- Rule of Thirds: Imagine your frame divided into nine equal parts by two horizontal and two vertical lines. Placing your subject along these lines or at their intersections creates a balanced and engaging shot.
- Leading Lines: Use natural lines within the scene to guide the viewer’s eye toward the main subject. This could be a road, a row of trees, or even architectural elements.
- Depth: Incorporate foreground, middle ground, and background elements to add depth to your shots. This makes your scenes feel more dynamic and realistic.
Next time you’re framing a shot, think about what you want your audience to feel and how you can use composition to achieve that. Try different angles and perspectives to see what works best for your story.
Camera Movements
Camera movements can add a whole new dimension to your film, creating rhythm and enhancing the viewer’s experience. Whether you’re using a handheld camera or advanced equipment like a dolly or crane, understanding the impact of different movements is crucial.
- Pan: Moving the camera horizontally from one side to another. This is perfect for capturing wide landscapes or following a character’s movement across a scene.
- Tilt: Moving the camera up and down. Tilting can be used to reveal a character’s height or to give an overview of a tall structure.
- Zoom: Changing the focal length of the lens to move closer to or further from the subject. Zooming in can highlight emotions, while zooming out can show the context of the scene.
- Tracking Shot: Moving the camera to follow a subject. This can be achieved with a dolly or Steadicam and adds a dynamic feel to the scene.
Experimenting with camera movements can lead to unexpected and visually compelling results. When I first started, I used a simple pan to capture a sunset. The movement added a layer of drama and made the scene much more captivating. What techniques will you try to bring your story to life?
Take these insights and apply them to your next project. By mastering framing, composition, and camera movements, you can create a visual experience that resonates with your audience. Happy filming!
Lighting Techniques
Lighting techniques in film shooting create mood and depth. Proper lighting highlights characters and sets the scene. Different angles and intensities add drama or softness, enhancing the visual story.
Lighting is one of the most critical aspects of film shooting. It sets the tone, creates the mood, and can dramatically impact the overall quality of your footage. Whether you’re a beginner or a seasoned filmmaker, understanding different lighting techniques can elevate your projects to a professional level. In this section, we will explore two main types of lighting: natural light and artificial light.Natural Light
Using natural light can be a game-changer in film shooting. It’s free, abundant, and offers a unique quality that artificial light sometimes struggles to replicate. Golden Hour: The hour after sunrise and before sunset is known as the “golden hour.” During this time, the light is soft and warm, making it ideal for shooting scenes that require a natural, gentle glow. Have you ever noticed how everything looks magical during these times? That’s the golden hour effect. Diffusion: If the natural light is too harsh, you can use a diffuser. A simple white bedsheet or a professional diffuser can soften the light, reducing harsh shadows and giving your scene a balanced look. Weather Considerations: Weather can be unpredictable. Always have a backup plan. Cloudy days can act as a natural diffuser, giving you a soft and even light. On sunny days, using reflectors can help direct sunlight where you need it most. Are you making the most of the natural light available to you?Artificial Light
Artificial light gives you control over your lighting environment, regardless of the time of day or weather conditions. It’s essential for indoor shoots and when specific lighting effects are needed. Key Light: The key light is your main source of light in a scene. Position it at a 45-degree angle from your subject to create depth and dimension. This technique can highlight the facial features and add a dramatic effect. Fill Light: A fill light is used to reduce shadows created by the key light. Place it on the opposite side of the key light, but keep it dimmer. This balances the light, making your subject look more natural. Back Light: Also known as a hair light, a back light is placed behind the subject. It helps to separate the subject from the background, adding depth and a three-dimensional feel to your scene. Practical Lights: These are light sources that appear within the scene, such as lamps, candles, or even computer screens. Practical lights can enhance the realism of the scene and add interesting lighting effects. Are your scenes missing that professional touch? Try incorporating these lighting techniques to see a remarkable difference. Understanding and mastering both natural and artificial lighting techniques can significantly enhance the visual appeal of your films. By being intentional with your lighting choices, you can create a captivating and professional-looking scene that resonates with your audience.Sound Design
Sound design is crucial in film shooting. It brings scenes to life. Good sound design creates an immersive experience. It can make or break a film. The process involves on-set recording and post-production sound. Both are essential for high-quality audio.
On-set Recording
On-set recording captures the raw sounds. This includes dialogue, ambient noise, and sound effects. The quality of these recordings is vital. Poor on-set recording can ruin scenes. Use a good microphone and a skilled sound crew. They ensure every sound is clear and crisp. Proper placement of microphones is important. It avoids unwanted noise and captures clear audio.
Post-production Sound
Post-production sound refines the audio. It enhances the on-set recordings. This process includes editing, mixing, and adding effects. Sound editors clean up the raw audio. They remove unwanted noise and ensure clarity. Mixing balances the different sound elements. This creates a harmonious audio track. Adding sound effects and music elevates the film’s impact. It enriches the viewer’s experience. Every detail in post-production matters. It ensures the final product is polished and professional.
Working With Actors
Working with actors is a crucial aspect of film shooting. The way you interact with and direct your cast can make or break the authenticity and impact of your film. This section will offer practical tips and insights into building effective relationships with your actors, ensuring smooth collaborations and stellar performances.
Directing Tips
As a director, your goal is to bring out the best in your actors. Here are some tips to help you guide them effectively:
- Communicate Clearly: Be specific about what you want from a scene. Avoid vague directions like “Make it more intense.” Instead, say something like, “Show your anger through your eyes, but keep your voice calm.”
- Listen Actively: Pay attention to your actors’ ideas and concerns. Their input can offer fresh perspectives and improve the scene.
- Be Supportive: Encourage your actors, especially when they are struggling. A simple “Great job” can boost their confidence significantly.
- Provide Constructive Feedback: Focus on what can be improved rather than what went wrong. For instance, “Try slowing down your dialogue to create more tension,” instead of “You’re speaking too fast.”
Building Chemistry
Good chemistry among actors can elevate your film. Here’s how to foster it:
- Rehearsals: Organize regular rehearsals to help actors get comfortable with each other. This builds trust and familiarity.
- Workshops: Conduct acting workshops focusing on team-building exercises. These can break the ice and create a sense of camaraderie.
- Encourage Off-Camera Bonding: Suggest activities outside of shooting. Sometimes, a casual dinner can do wonders for on-screen chemistry.
- Pair Up New and Experienced Actors: Let seasoned actors mentor the newer ones. It creates a supportive environment and enhances performance quality.
Have you ever had difficulty guiding an actor? How did you overcome it? Share your experiences below and let’s learn from each other.
Post-production
Post-production is where the magic happens in film shooting. It’s the phase where the raw footage transforms into a cohesive and compelling story. This stage is not just about piecing shots together; it’s about enhancing the narrative, fixing errors, and ensuring that the final product captivates the audience. Let’s dive into some crucial aspects of post-production that can elevate your film to the next level.
Editing Software
Choosing the right editing software is a pivotal decision in the post-production process. Your software should align with your project’s needs and your skill level. Industry giants like Adobe Premiere Pro and Final Cut Pro are popular choices due to their extensive features and user-friendly interfaces.
Adobe Premiere Pro offers a seamless integration with other Adobe products, which can be a huge advantage. It has powerful tools for cutting, splicing, and arranging clips. The software also supports a wide range of file formats, making it versatile for different types of projects.
Final Cut Pro, on the other hand, is favored by many for its intuitive design and powerful editing capabilities. It’s known for its magnetic timeline, which makes rearranging clips a breeze. It’s an excellent choice if you’re working on a Mac.
But don’t overlook simpler options like iMovie or DaVinci Resolve if you’re just starting. These programs can provide a solid foundation in editing without overwhelming you with too many features.
What editing software do you use, and how has it impacted your workflow? Sharing experiences can help others make informed choices.
Color Grading
Color grading is the secret sauce that adds mood and depth to your film. It’s more than just correcting colors; it’s about creating a visual tone that aligns with the story you’re telling. Think of color grading as a way to evoke emotions and set the scene.
DaVinci Resolve is renowned for its powerful color grading capabilities. It offers a range of tools that can help you tweak the hue, saturation, and luminance of your footage. The node-based interface allows for intricate adjustments, giving you full control over the final look of your film.
If you’re looking for something more straightforward, Adobe Premiere Pro also has robust color grading tools. Lumetri Color panel in Premiere Pro is user-friendly and provides a range of presets, which can be a great starting point. You can fine-tune these presets to match your vision.
Don’t underestimate the impact of color grading. A well-graded film can distinguish a professional production from an amateur one. Experiment with different looks and see how they change the feel of your scenes.
Have you ever watched a film where the color grading stood out to you? Reflect on how it influenced your perception of the story.
Post-production can be a daunting phase, but with the right tools and techniques, it can also be incredibly rewarding. Dive into editing and color grading with curiosity and creativity. Your audience will thank you for it.
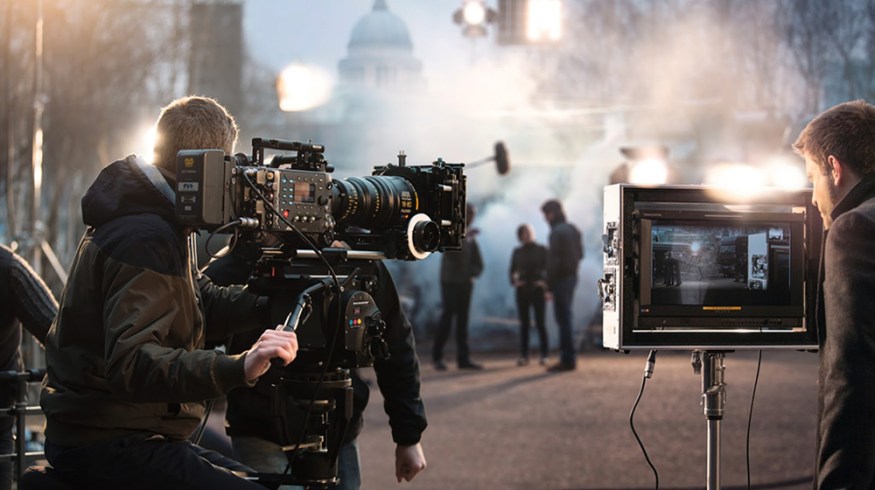
Credit: www.premiumbeat.com
Visual Effects
Film shooting often relies on visual effects to create stunning scenes. These effects enhance storytelling, bringing imaginary worlds to life.
Visual effects are a magical component in the world of film shooting. They transform ordinary scenes into extraordinary visual experiences. Whether it’s a dragon soaring over a medieval village or a spaceship zooming through the galaxy, visual effects can make the impossible look real. They play a crucial role in storytelling, adding depth and excitement to the narrative. In this section, we’ll explore two main types of visual effects: practical effects and digital effects.Practical Effects
Practical effects involve real-world techniques to create special visuals on set. Think of classic movies where explosions, rain, and monsters were created using tangible materials. These effects are physically present during the shoot, providing a sense of realism that’s hard to replicate digitally. For instance, consider the famous boulder chase scene in “Raiders of the Lost Ark.” The gigantic boulder chasing Indiana Jones was an actual prop, giving actors and viewers a palpable sense of danger. Practical effects can make a scene feel authentic because actors interact with real elements. When using practical effects, attention to detail is crucial. You need to ensure that props, makeup, and set designs are meticulously crafted. This can be time-consuming and sometimes costly, but the results are often worth it. The tangible nature of practical effects can enhance the actor’s performance and the audience’s immersion. Have you ever tried creating a small-scale practical effect for a home video? It’s a fun and insightful exercise to understand the effort behind these effects.Digital Effects
Digital effects, or CGI (Computer Generated Imagery), have revolutionized film production. They allow filmmakers to create stunning visuals that would be impossible or too expensive to achieve with practical effects. With digital effects, you can bring to life otherworldly creatures, futuristic cities, and epic battles. One notable example is “Avatar,” where the lush landscapes of Pandora were entirely created using digital effects. This level of detail and creativity opened up new possibilities for filmmakers. Digital effects are incredibly versatile and can be used to enhance almost any scene. The key to effective digital effects is seamless integration with live-action footage. The goal is to make the audience believe that the digital elements are part of the real world. This requires skilled artists who can meticulously blend CGI with practical shots. You might wonder how accessible digital effects are for budding filmmakers. With advancements in technology, many tools and software are now available at lower costs. You can experiment with digital effects using programs like Blender or After Effects, even on a limited budget. Have you considered how digital effects could elevate your storytelling? Even simple enhancements can add a lot of value to your project. Incorporating visual effects, whether practical or digital, can significantly boost your film’s appeal. They allow you to push creative boundaries and engage your audience in new and exciting ways. So, which type of effect will you try in your next project?
Credit: www.freepik.com
Frequently Asked Questions
What Is The Meaning Of Film Shooting?
Film shooting refers to the process of recording scenes for a movie using cameras and other equipment. It involves actors, directors, and crew working together to create visual content.
How Is Film Shooting Done?
Film shooting involves planning, scripting, casting, location scouting, and scheduling. The crew sets up cameras, lights, and sound equipment. Actors perform scenes, which are recorded and reviewed. Editing finalizes the footage.
Why Is Filming Called Shooting?
Filming is called shooting because early cameras resembled guns. Operators “shot” film like taking aim to capture scenes.
What Is The Difference Between Filming And Shooting?
Filming refers to recording video content, typically for movies or TV shows. Shooting can mean capturing photos or video footage.
Conclusion
Wrapping up, film shooting is an art filled with creativity and hard work. Each step, from planning to editing, plays a vital role. Understanding the basics can make the process smoother. Practice and patience are crucial. Experiment with different techniques.
Stay inspired and keep learning. This way, your filmmaking journey will be enjoyable and rewarding. Remember, every great filmmaker started somewhere. Keep pushing boundaries and capturing stories. Happy shooting!
{ “@context”: “https://schema.org”, “@type”: “FAQPage”, “mainEntity”: [ { “@type”: “Question”, “name”: “What is the meaning of film shooting?”, “acceptedAnswer”: { “@type”: “Answer”, “text”: “Film shooting refers to the process of recording scenes for a movie using cameras and other equipment. It involves actors, directors, and crew working together to create visual content.” } } , { “@type”: “Question”, “name”: “How is film shooting done?”, “acceptedAnswer”: { “@type”: “Answer”, “text”: “Film shooting involves planning, scripting, casting, location scouting, and scheduling. The crew sets up cameras, lights, and sound equipment. Actors perform scenes, which are recorded and reviewed. Editing finalizes the footage.” } } , { “@type”: “Question”, “name”: “Why is filming called shooting?”, “acceptedAnswer”: { “@type”: “Answer”, “text”: “Filming is called shooting because early cameras resembled guns. Operators \”shot\” film like taking aim to capture scenes.” } } , { “@type”: “Question”, “name”: “What is the difference between filming and shooting?”, “acceptedAnswer”: { “@type”: “Answer”, “text”: “Filming refers to recording video content, typically for movies or TV shows. Shooting can mean capturing photos or video footage.” } } ] }
